Disputes
The following diagram illustrates the flow of the disputes process in PayU, highlighting each step from notification to resolution:
Permissions Required
To access this module, your profile must have the following permissions enabled:
- Reports > Refunds and disputes
- Reports > Resolve disputes with buyers (manage chargebacks)
Refer to Profiles and Permissions for more details.
Why Is It Important to Respond to a Dispute?
Responding to disputes promptly is critical to protect your business:
- Avoid damaging trust with customers.
- Prevent funds from being deducted from your account.
- Mitigate the risk of increased reserve funds imposed by the risk area.
- Preserve your PayU code score with payment networks.
- Ensure disputed amounts are not frozen for prolonged periods.
You must provide evidence before the deadline set by the bank. Missing the deadline may result in the amount being debited from your account.
For information on deadlines, refer to Deadlines for Submitting Evidence.
Receiving Dispute Notifications
You can receive dispute notifications through two methods:
- Email Notifications: Receive updates directly via email.
- Automatic Notifications: Configure a URL in the Technical Configuration section of the Management Panel to receive dispute updates via
POST.
Steps to Enable Notifications
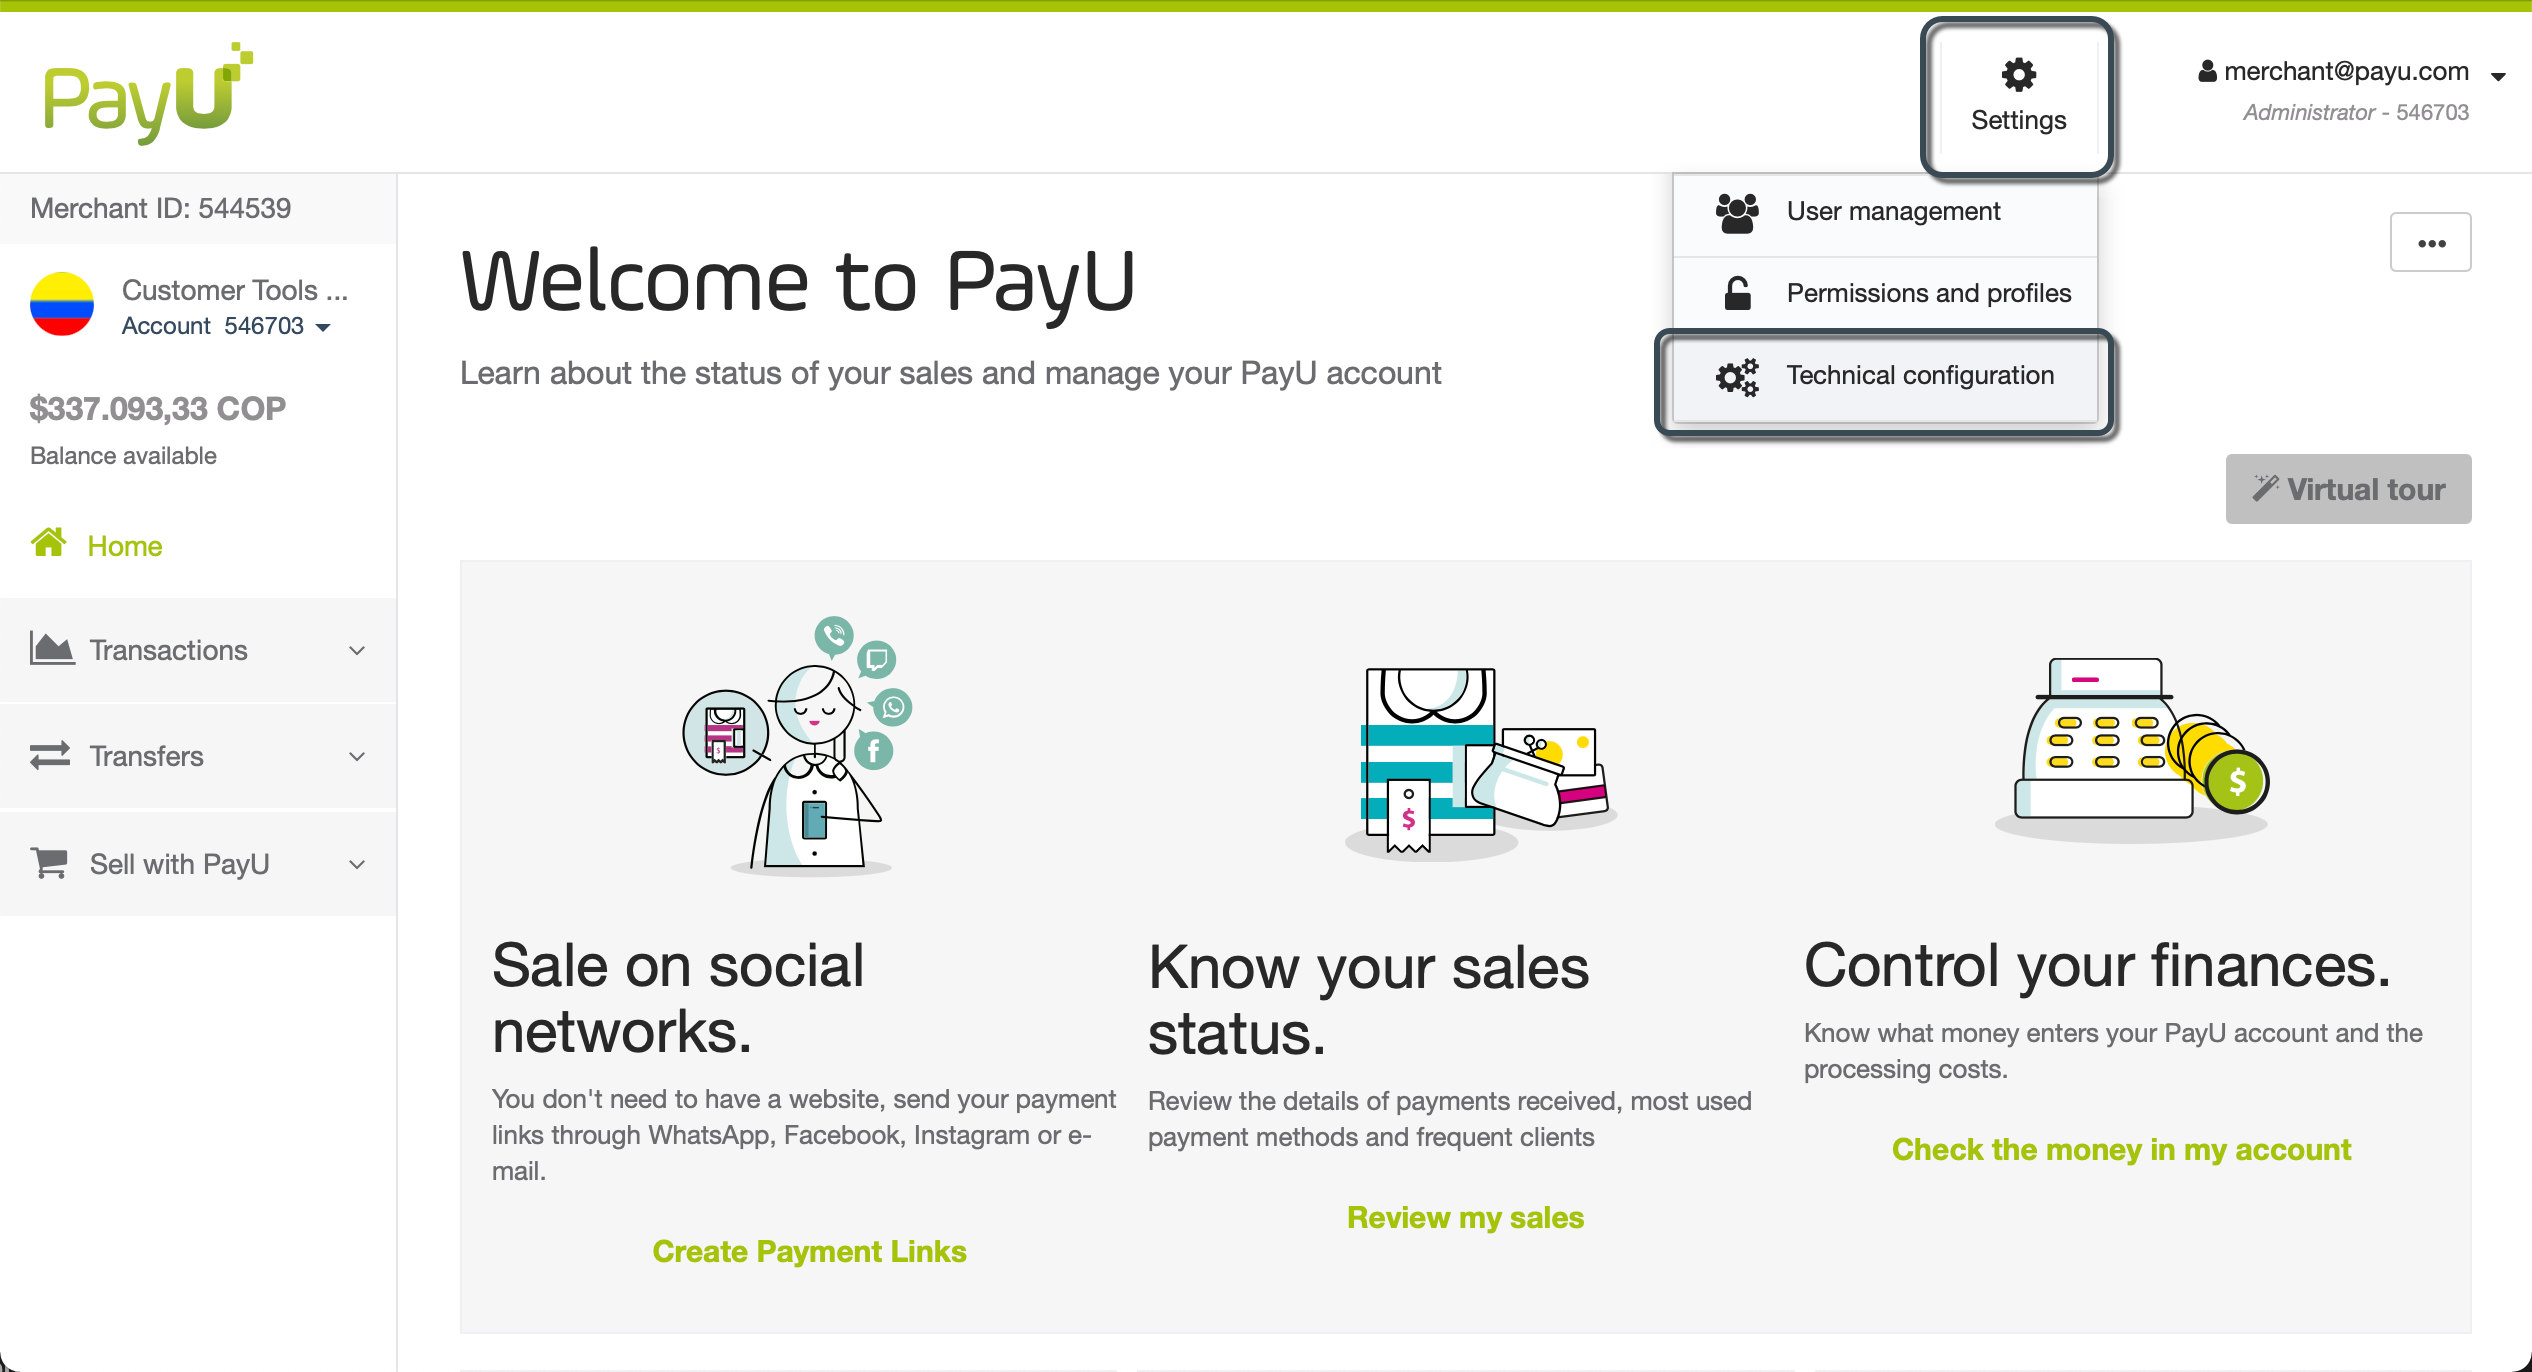
- Log into the PayU Management Panel, navigate to Settings, and select Technical Configuration.
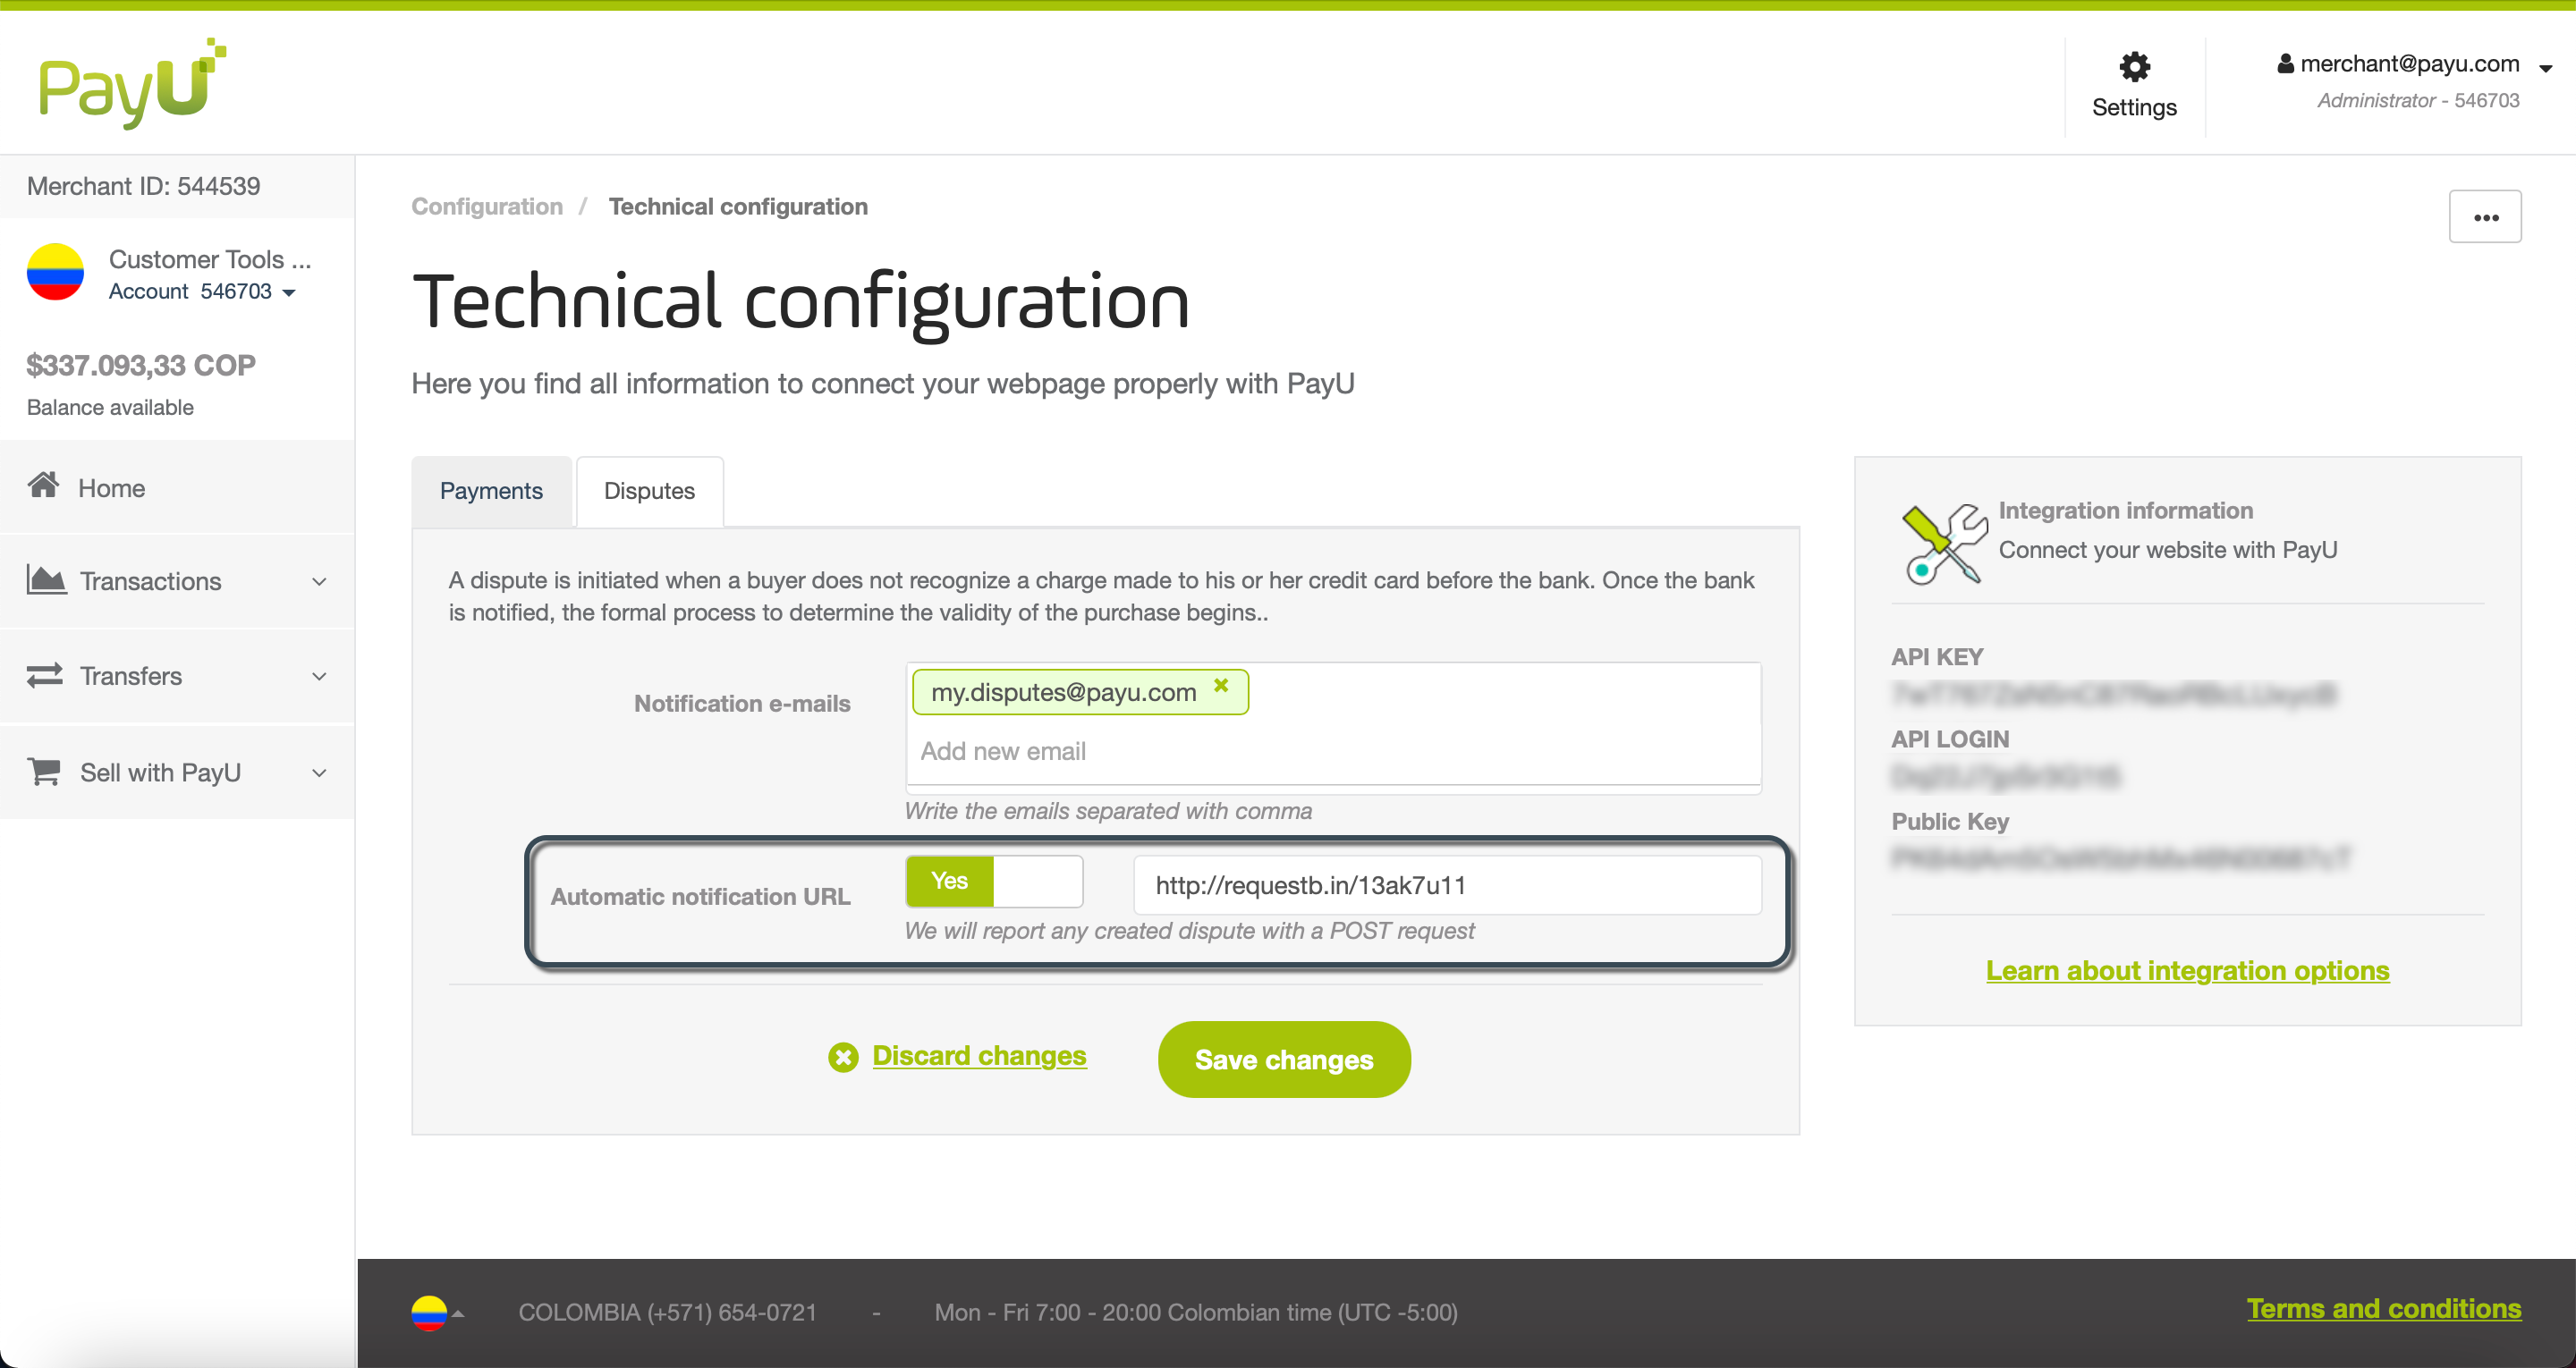
- In the Disputes tab, enter the email addresses for receiving notifications or enable the automatic notification URL, then specify the domain where you want our API to send
POSTupdates. Once you have enabled one or both notification methods, click on Save changes.
Resolving Disputes
Disputes occur when buyers dispute charges on their credit cards. The bank notifies PayU, and the formal process begins to validate the transaction.
Tip
If you have the cardholder’s contact information, reach out to resolve the issue. If the dispute stems from confusion (e.g., unrecognized charges), ask the buyer to contact their bank and withdraw the claim. This approach often resolves disputes in your favor.Steps to Resolve Disputes
-
When notified of a dispute, configure your email or URL to receive updates. Refer to Technical Configurations.
-
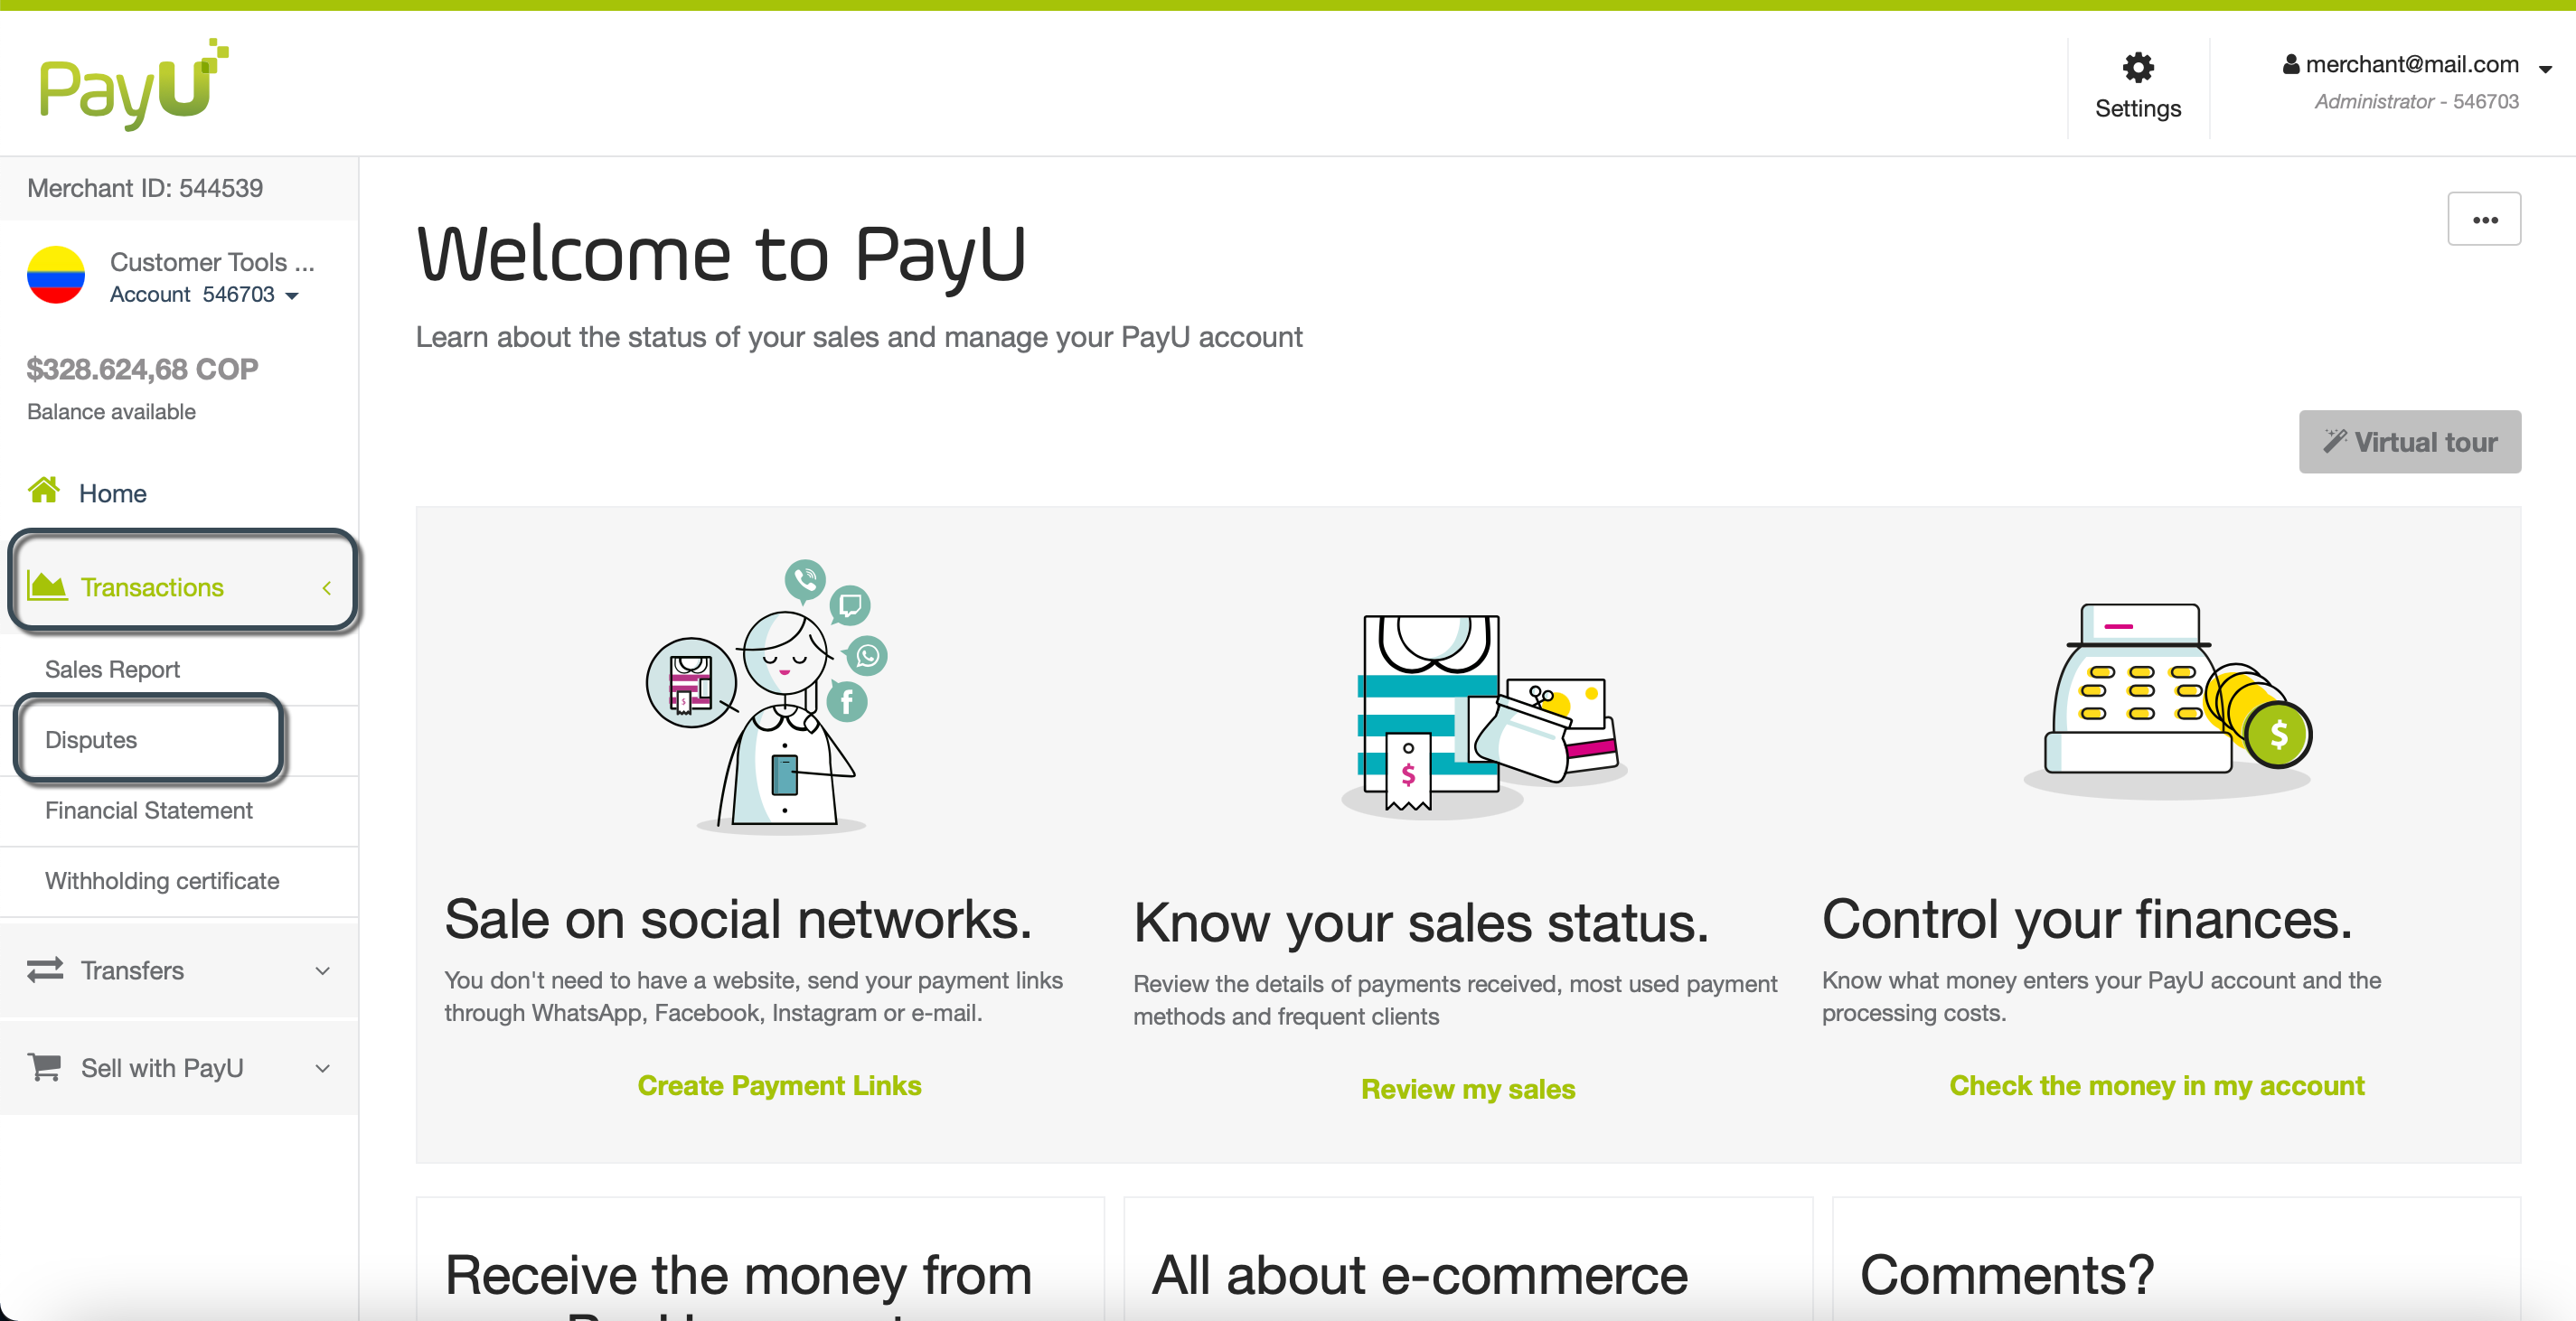
Log into your PayU account, expand the Transactions menu, and select Disputes.
- In the Disputes module, locate the dispute. Use filters if needed.
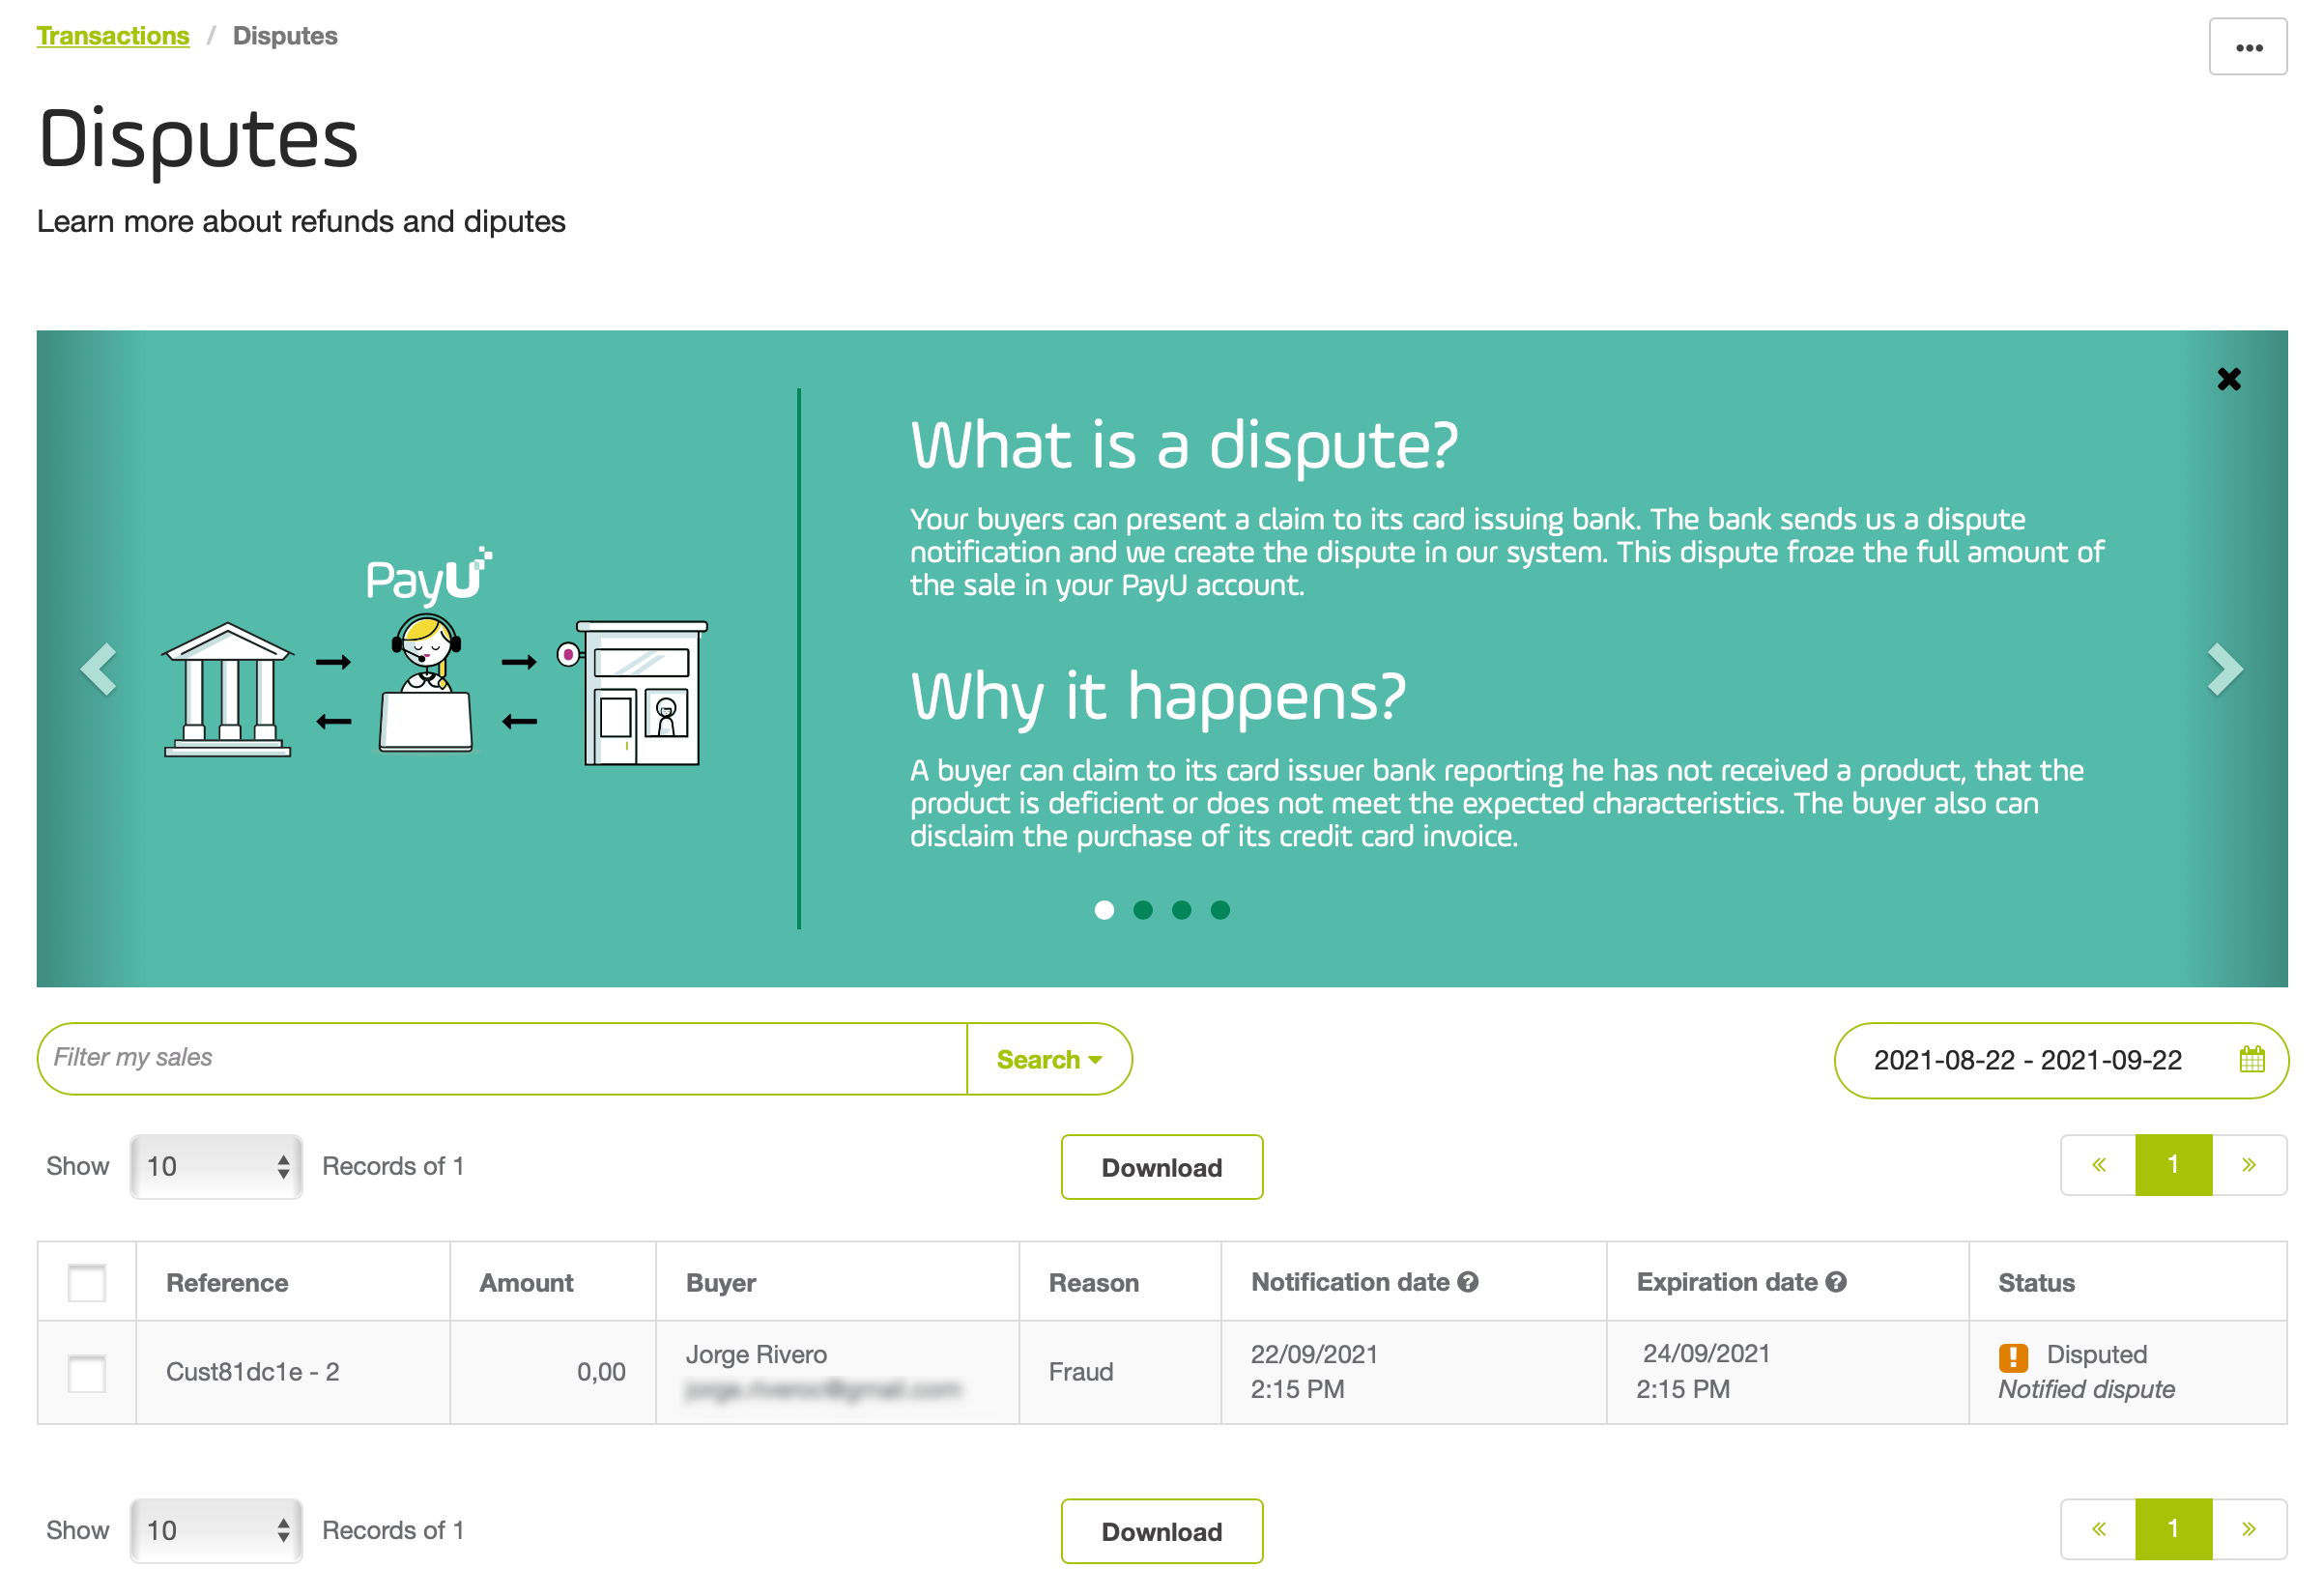
- Review the dispute details on the right panel and click Resolve Dispute.
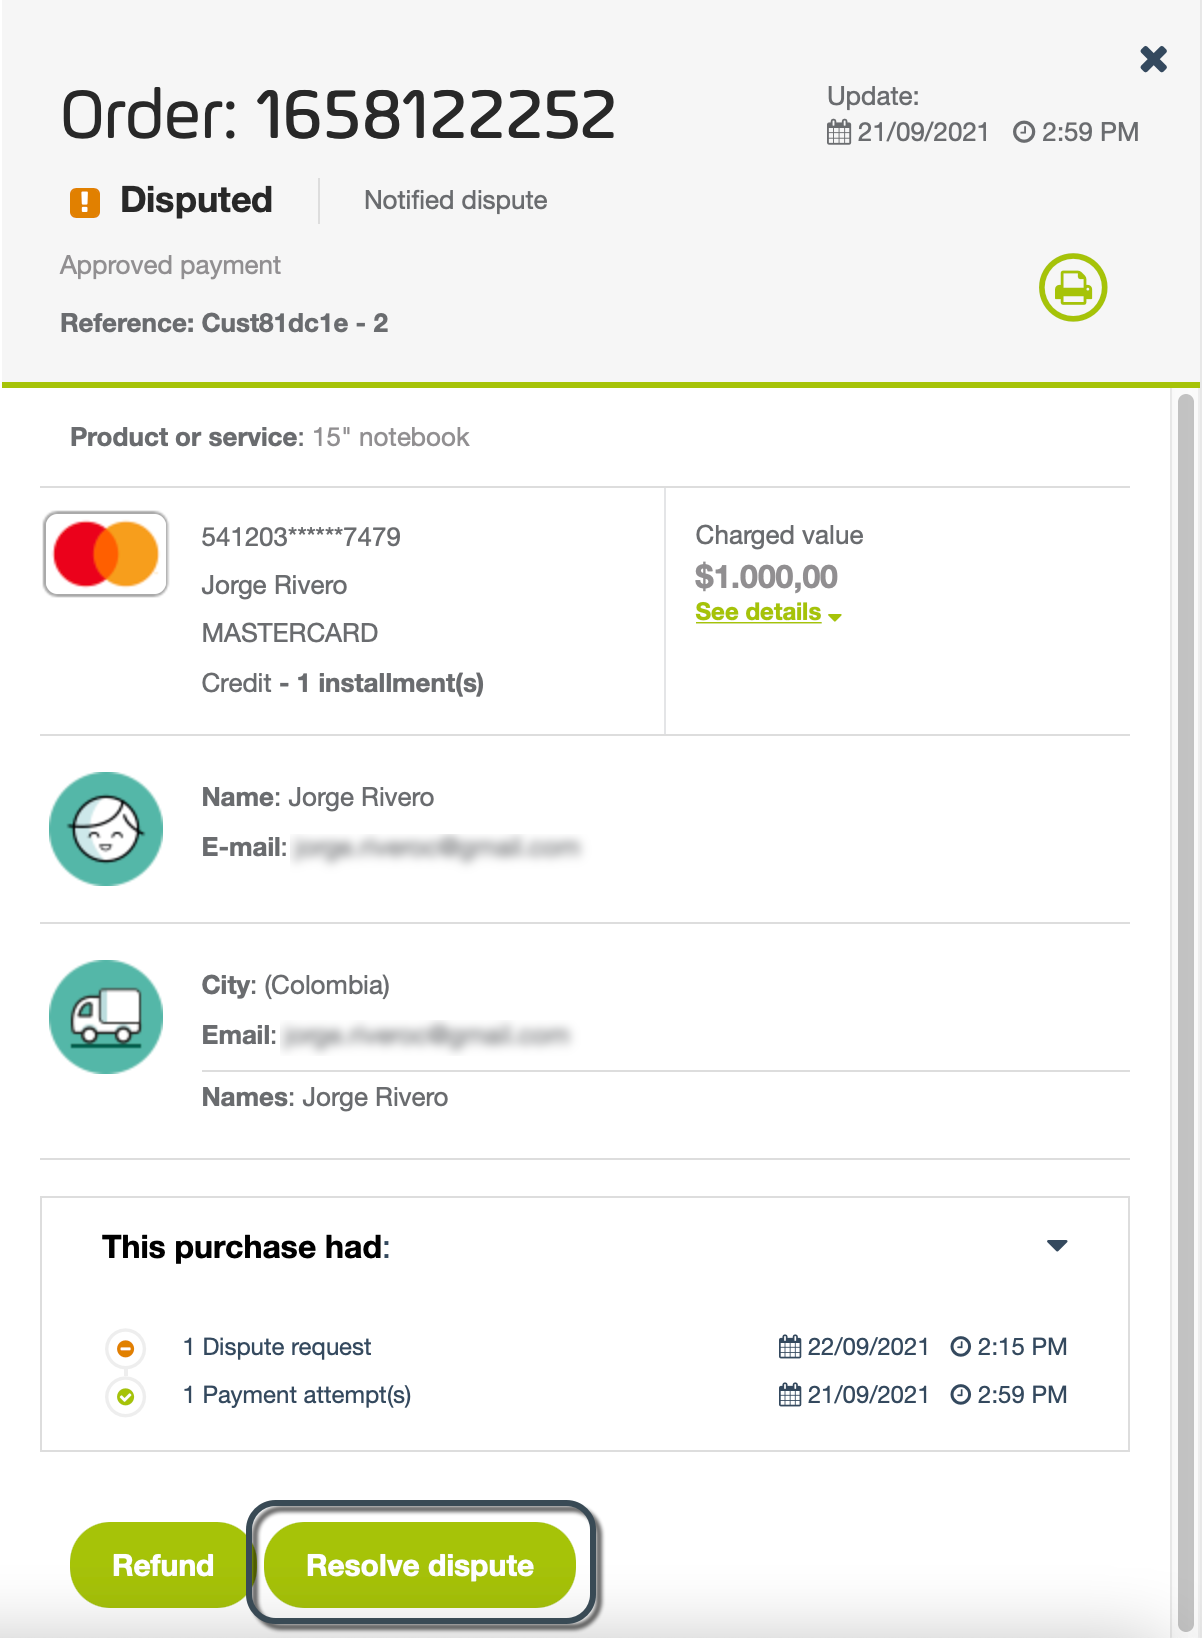
- In the pop-up window, review the reason for the dispute and the deadline for submitting evidence. Click Attach File to upload your evidence.
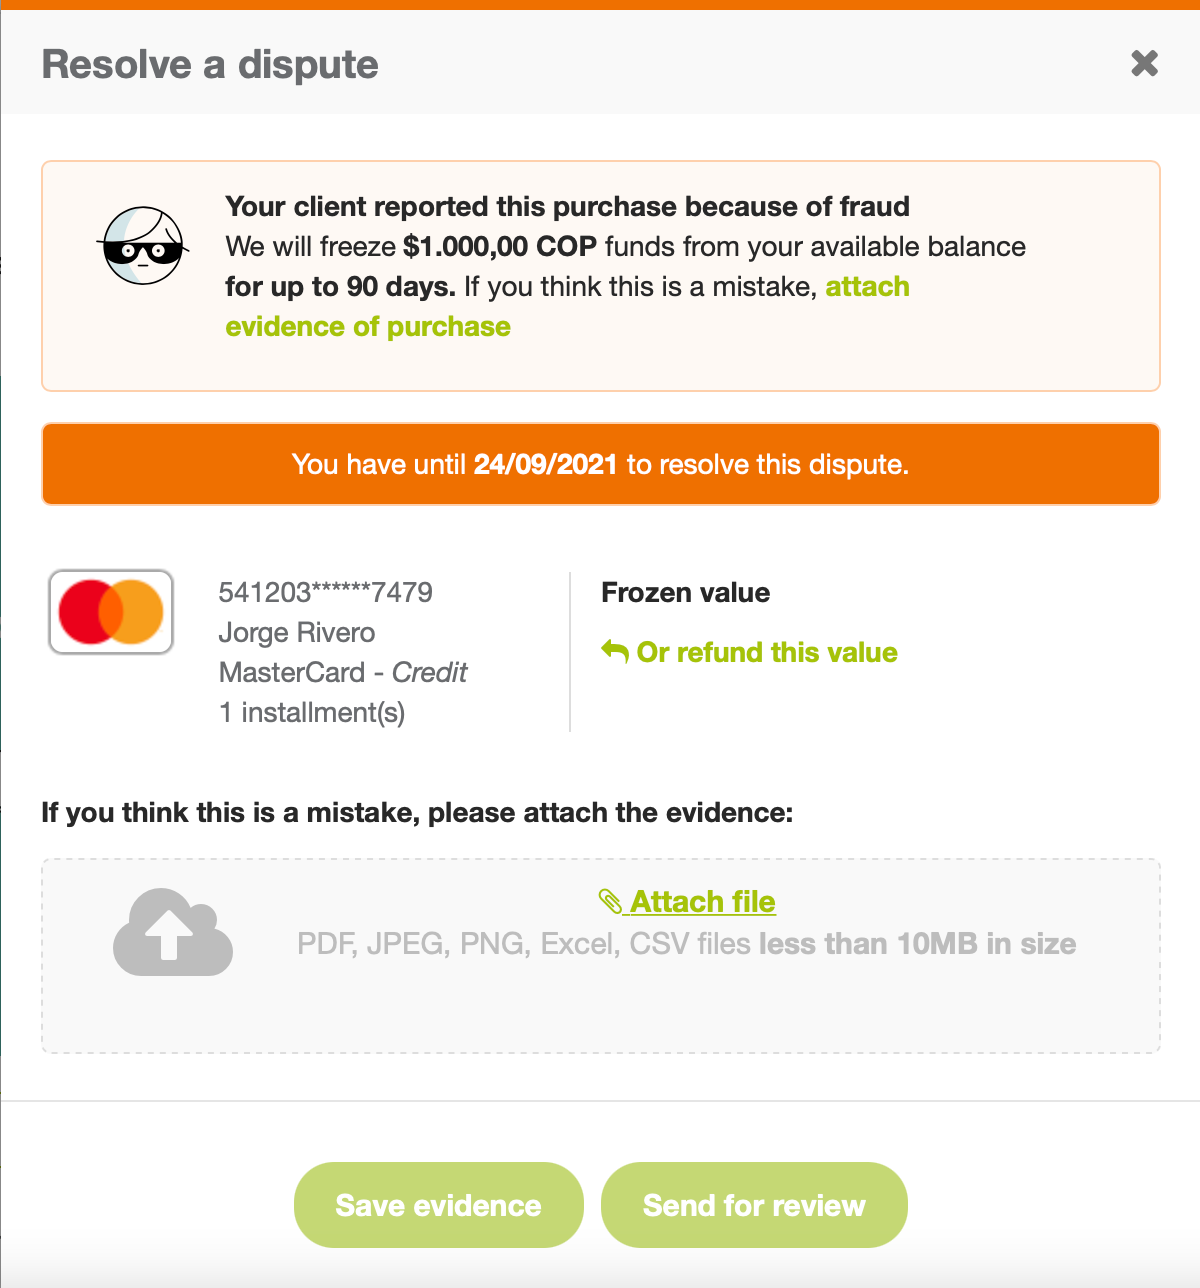
Note
If you accept the dispute, you can initiate a Refund by clicking Or refund this value.- Upload evidence (PDF files under 10MB) and click Save Evidence. Once saved, click Send for Review.
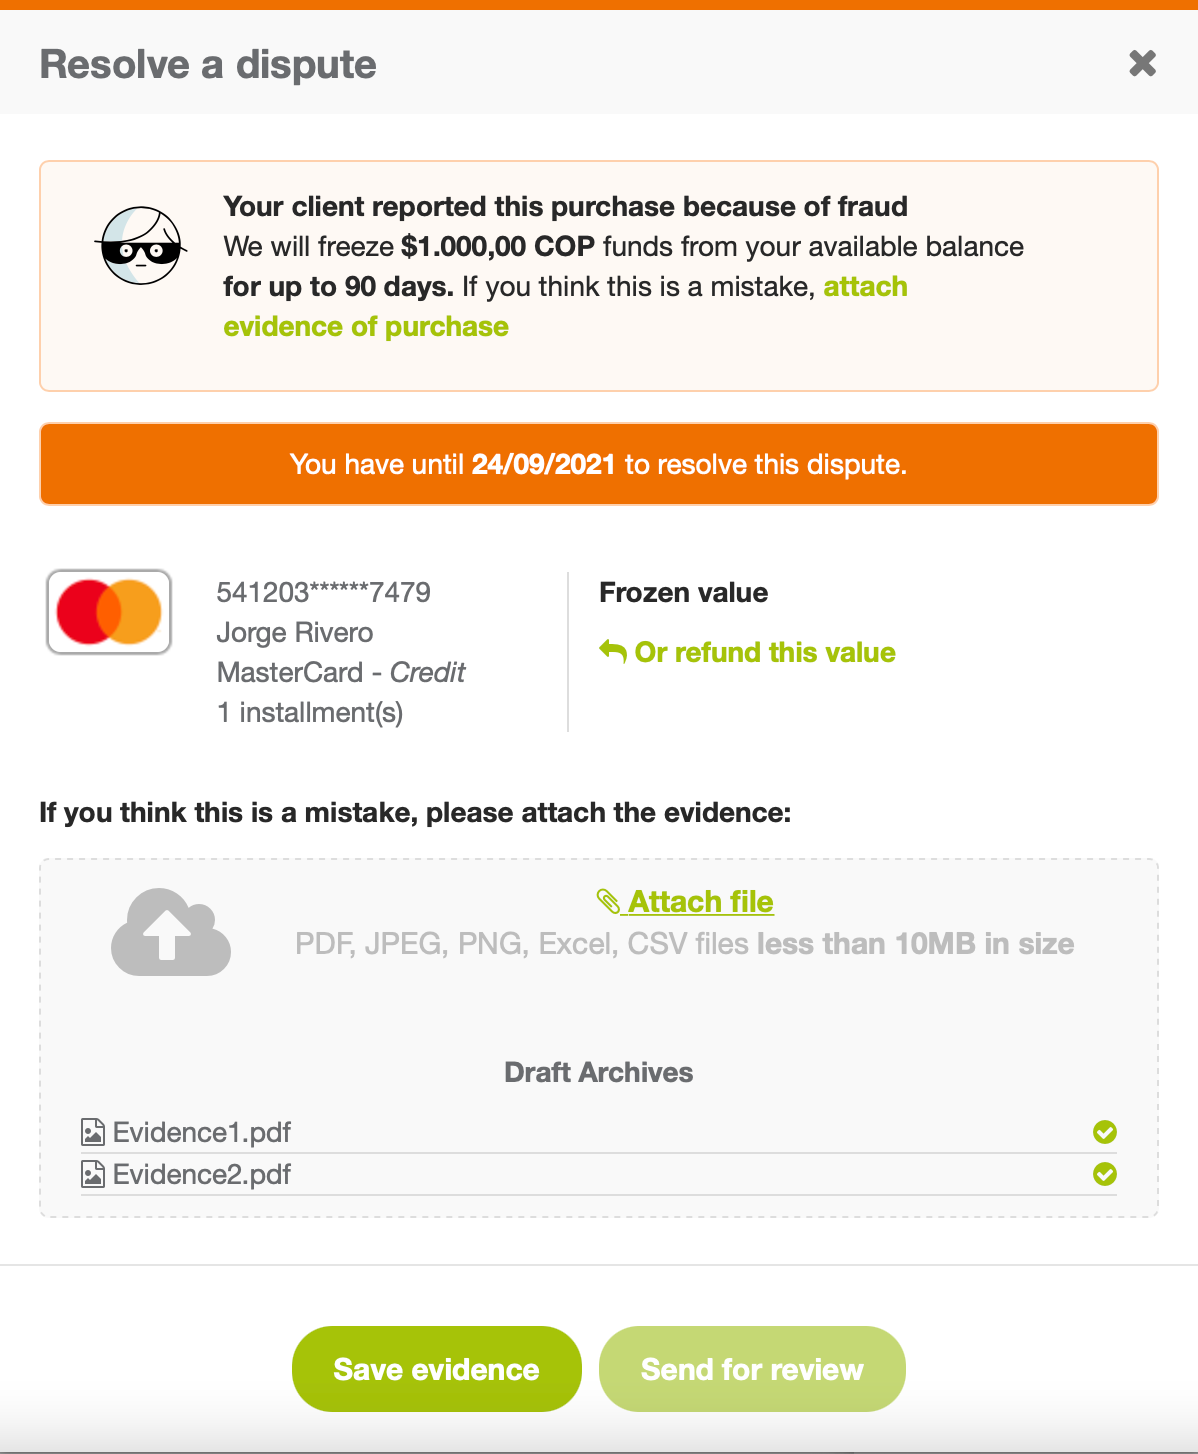
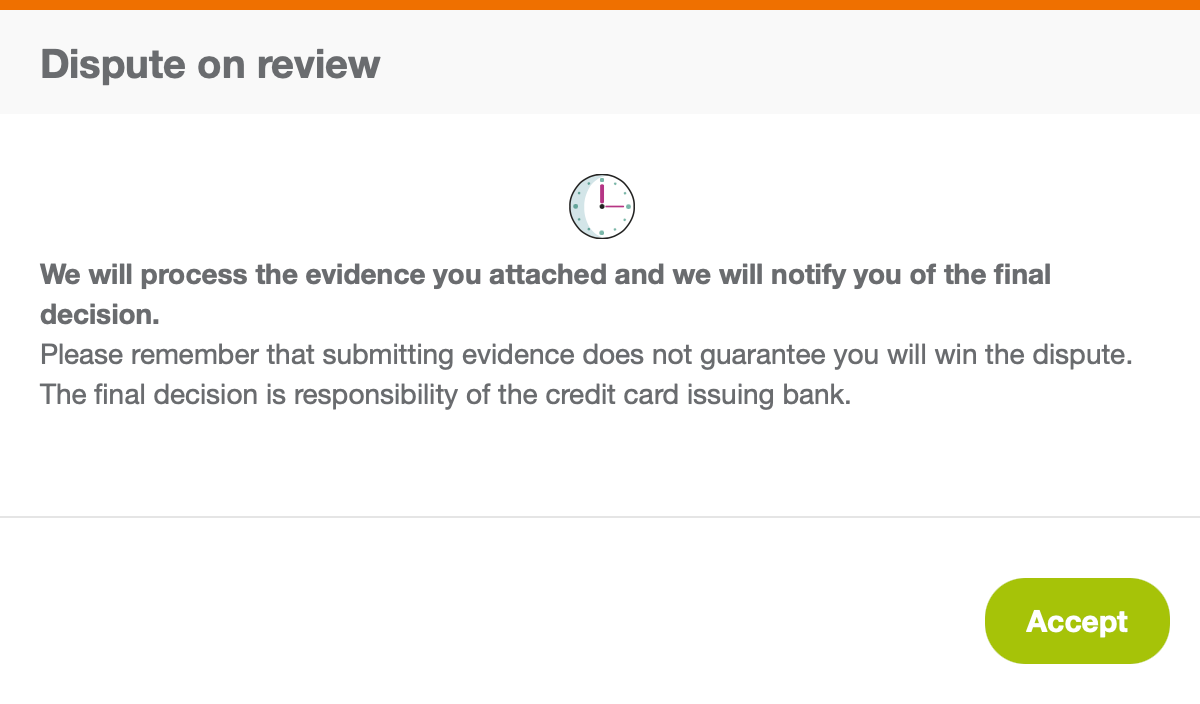
- A confirmation window will appear once your evidence is submitted.
-
PayU forwards the evidence to the issuing bank or network. The case outcome may be:
- Won: The dispute is resolved in your favor (no chargeback).
- Lost: The dispute results in a chargeback.
- Refunded: You voluntarily refunded the buyer, avoiding a chargeback.
Refer to Dispute States for detailed information on dispute statuses.
Final Considerations
When the financial entity communicates the resolution, the dispute status is automatically updated in the Management Panel. Ensure you monitor dispute notifications and respond promptly to minimize risks and potential losses.